One question that often arises when first getting started in Leapfrog Works is, “how can I use my existing data in Leapfrog Works?”. While there are endless ways to use your data in Works, this blog post will detail a typical workflow for bringing in a minimal amount of data which can be used to build and refine a geologic model.
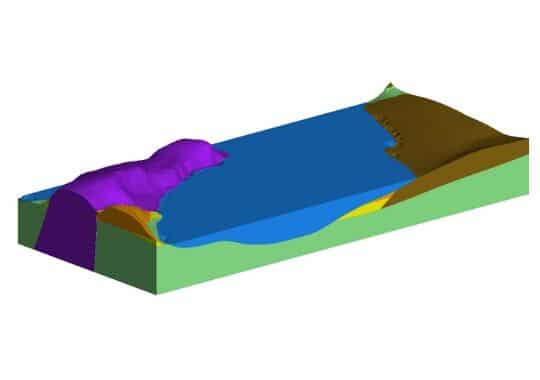
For the following example, data associated with a proposed tunnel construction project was brought into Leapfrog Works to visualise, make interpretations, and construct a set of final plans.
What data do you have?
When starting a new project, one of the first questions you’ll often ask yourself is what data you have and what are your deliverables.
A good starting point is looking at our technical specifications guide before importing or exporting any files into or out of any project tree folders in Works.
The data gathered for this tunnel construction project included boreholes (.csv), GIS lines (.shp), AutoCAD Designs (.dwg), a georeferenced map (.tif or .tiff), and a Digital Elevation Model (DEM) File for the topography (.dem). This was all the data needed to quickly and accurately build a geologic model for this example.
How do you bring this data into Works?
The Leapfrog Work’s interface was designed to be user friendly and make it as easy as possible for you to bring in your data and interact with it in 3D. Our goal is to break down the barriers of interoperability among common solutions and programs you might be using in your current workflow.
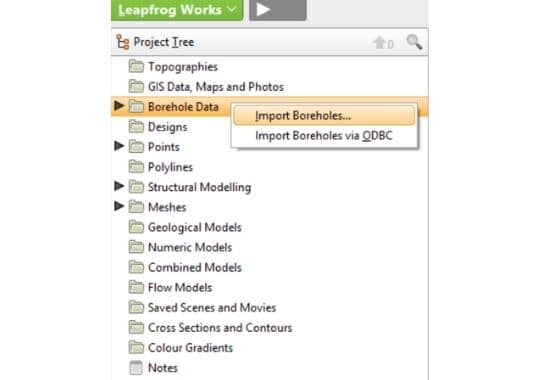
Everything in Works can then be brought in by ‘right clicking’ on the associated folder and choosing the option to ‘Import…’. Then it is as simple as locating and opening your files in Works. Our YouTube playlist has detailed videos on importing borehole data, georeferenced maps, topographies, designs, and more.
Where do you go from here?
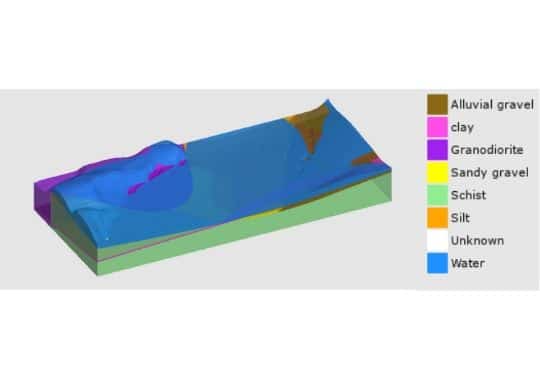
Once your data has been imported, you are now ready to begin modelling. The biggest challenge when starting a geologic model in Works is deciding which surface types to use and when. Surface types for your lithologies aren’t always going to be geologically intuitive, for this example, a clay lens was best modeled as a vein with pinch outs and water as an erosional surface.
Once your surfaces, faults, and boundaries have been established you must ‘activate’ your surfaces and faults to create your 3D model volumes. Once activated, your output volumes will be created, and you now have a 3D model.
Now it’s time to use your knowledge of the site & geology to refine & finish your project. When you initially create a model in Works, you might realise the surfaces don’t precisely match your desired outcome. Therefore, we have created a multitude of options for editing and adding data to your surfaces.
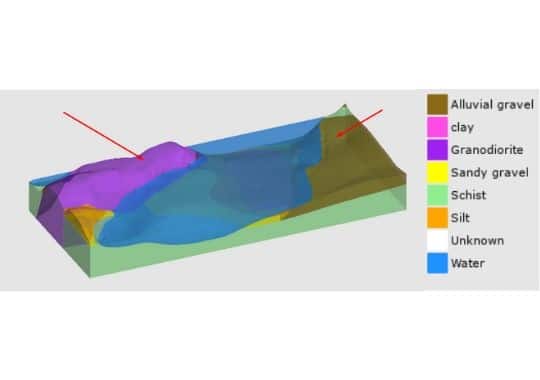
Once you have manually refined your model, it’s time to add the other data you have imported to the surfaces. For example, your GIS contact lines can now be used to refine your lithology contact locations.
Support when you need it
We have a global team of Customer Solution Specialists (CSS) that are here to help you whenever you need it. At Seequent, we believe in offering technical advice in a timely manner, that’s why our CSS team is comprised of Geologist and Geotechnical Engineers. To contact the team, simply email [email protected]. Also, make sure you stay tuned for our webinar coming up in June where Customer Solution Specialist Gary Johnson will walk you through an ideal workflow and how to construct a geologic model in Works.